
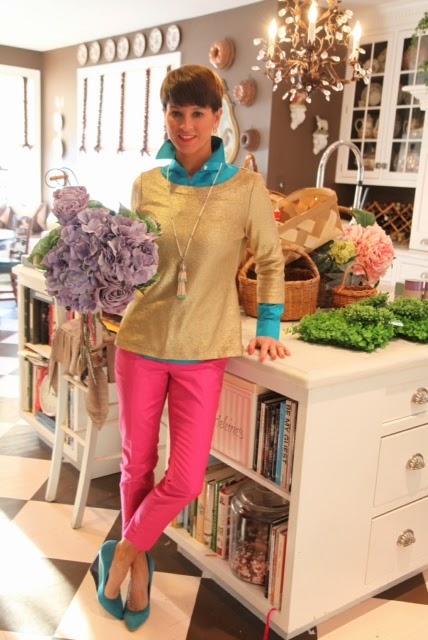
As a child, like every other holiday, my mother went out of her creative way to make everything seem magical. I can remember clearly exactly what our baskets looked like. Almost Alice In Wonderland-like. Each oversized straw basket was stuffed to the gills with the most decadent treats and a solid chocolate bunny that gave me a toothache just looking at it. My mother was the bunny-nazi, insistent that the Easter bunny only delivered a "solid chocolate bunny" rather than a hollow one. Now that's what I call quality control (try explaining that to a child). I remember the tears, "but I want a hollow bunny, it tastes better!" What did I know? The basket was over-stuffed with green "paper shred grass" and the entire perimeter of the basket was wrapped securely with either pastel yellow, pink, blue or green cellophane paper. Gathered tautly at the top, an elegant silk bow always stole the show. But we knew well not to tear open this masterpiece. Mom always pointed out the slit in the cellophane where the ends met. Here, you could reach in and out of of the little village that lived within our Easter baskets, without disturbing it's visual appeal. It's a surreal memory and one I want my children to experience
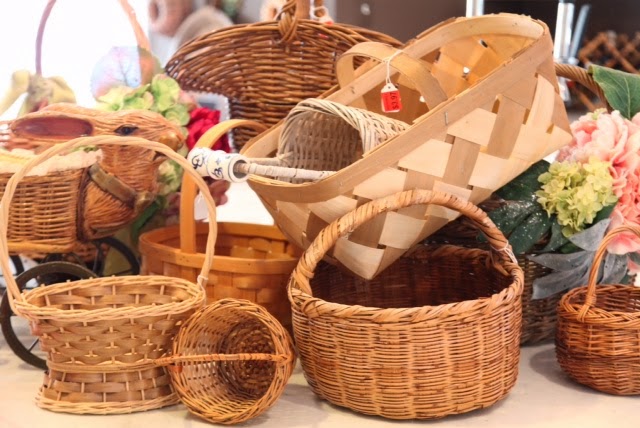
With the help of the Lehigh Valley, choc full of antique and thrift shops, I made a pilgrimage to find vintage Easter baskets and scrumptiously sweet candy the past couple of years. Although I travel to Josh Early in Allentown for many treats, Center Valley has a candy store at the Promenade Shops, Fuzziwig's Candy Factory, where many fun sweets and treats can be found (www.fuzziwigs.com) and I have to admit that the CVS in Coopersburg has the whimsical Peanuts gang themed chocolates, toys and more. As for antiquing, just blocks away from my home is Center Valley Antiques on route 309 South, where I am a regular customer. I find everything from home furnishings to brick a brack, including old baskets. Don't let the word "antiques" intimidate you, as every savvy shopper knows, not only can you find pricy treasures, but for the most part, inexpensive, mind blowing steals and deals. There are thrift shops all over the Lehigh Valley and it's the #1 place to find beautiful old baskets. I can walk in one second and out in minutes with my arms full of baskets. My Easter basket creations would not be complete without the help of Michael's and JoAnne craft stores in the Lehigh Valley. With some artificial flowers, leaves, grass and a hot glue gun, you, too, can make beautiful baskets. It's simple and just takes a little imagination. They make magical surprises for children on Easter. If you like this idea but are not so sure how to get started, just follow my simple instructions below.
Now hop to it!
Jamie
xoxo
Now hop to it!
Jamie
xoxo

My best advice is to carefully read through the instructions before
you begin this project, as it is not an easy task to remove the glue
from the basket or flower. Begin with a basic strategy.
What you will need:
~ Fabric scissors (for nice clean edges)
~ Wire cutters (to remove stubborn flower heads)
~ Silk or satin ribbon and a spool of tulle (or ribbon of choice)
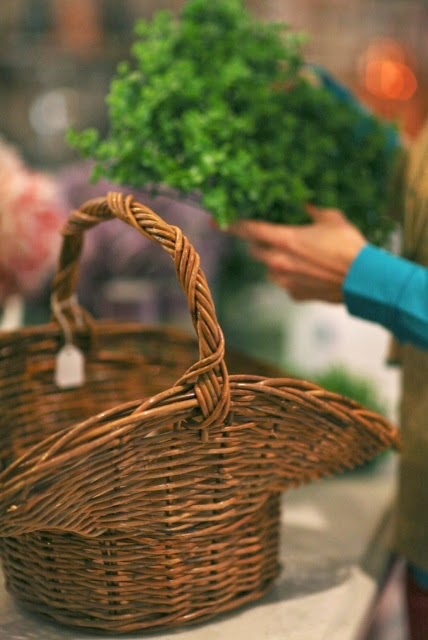
~ Any type of grass filler (I used a plastic faux boxwood square sold at Michael's Craft
Store)
~ Artificial flowers of choice (I used lavender roses and hydrangeas)
~ 1 decorative butterfly with a clip fastener on the back ((craft store)
~ 1 Hot glue gun and glue sticks

Begin
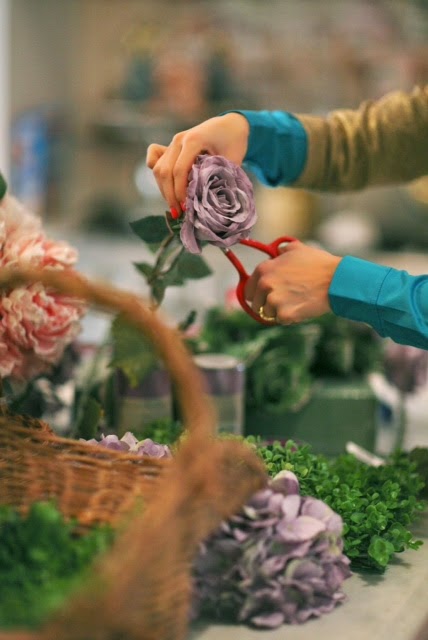
by gently removing all the flower heads from their stems, as well as
the leaves. Stubborn heads will have to be removed with wire cutters.
Begin
with flipping your sheet of plastic boxwood or moss upside down. Place
your basket on top and with a black sharper marker, trace the perimeter
of the basket (or just eyeball it and cut it). Cut out your traced
shape and fit it in the basket. You can also just shove the piece
inside as I did and it made nice walls inside the basket as well. If
you have a large basket. you may need to ADD additional pieces.
Tip:
If your basket is really deep, add floral foam to boost up you boxwood,
moss or desired filler.

Being
careful not to burn yourself, drizzle a fairly large amount of melted
hot glue on the reverse side of the flower head (near where it
originally connected to the stem).


Quickly
adhere your flowers to your desired location. Holding each flower for
at least 45 seconds to ensure it is secure. If it feels loose, just
squeeze your glue gun between the flowers and add some extra glue where
you are placing it. Sometimes, when
possible, I stick the remainder of the stem right between the
intertwined pieces of wood. This way, it acts as an anchor for the
flower. Be sure to add extra glue where needed. I usually work around
one side of a basket near the base of the handle. Be creative with
your placement. The rule is there are no rules! Just go with the flow or imitate mine. Place the flowers tautly together to ensure
that nestled bouquet look. Add some leaves in desired open areas by
adding a dab of hot glue to the stem and carefully inserting them.

Step I: Applying ribbon
I usually begin by gluing the end of a ribbon
(ribbon of choice, but in my case, satin) and tucking it into the
flowers, at the base of the handle where the flowers are secured. I
then slowly begin wrapping my handle with the ribbon, leaving a wide
space for some of the wood to be exposed. When I arrive at the opposite
end of the handle, I glue my ribbon right at the base. There is no
right or wrong way to glue it, outside of it being near the base. The
reason is, it will eventually be covered with a large bow.


Step
II: Adding and creating a bow
I usually cut a long piece of my satin
ribbon and tie it around the base of the handle where you ended and
glued your last piece. Begin by tying a bow, exactly as you would tie
your shoe. Cut another piece of ribbon, the same size and feed it
beneath the knot of your other bow. Now you can tie another bow, but
this time it will be running in the opposite direction.


Add some tulle
to your basket handle too, only this time, wrap it around the exposed
wooden spaces on the handle. To add some volume to your handle, Cut 4 - 1
ft pieces of tulle and tie them to the handle above the flowers. Tie
them as ONE bow. The volume comes when you spread out the tulle loops.
I added a beautiful faux butterfly to the center of my bow, which has a
clip already
affixed to the back. Adding some extra glue wouldn't hurt.


Voila, you
now have an EGGstravagant Easter basket!

I'm trying to do this! Went shopping today! I'll share if it comes out nicely!!!!
ReplyDelete